|
"Seriously, these have GOT to be against the Word of Wisdom." -random missionary 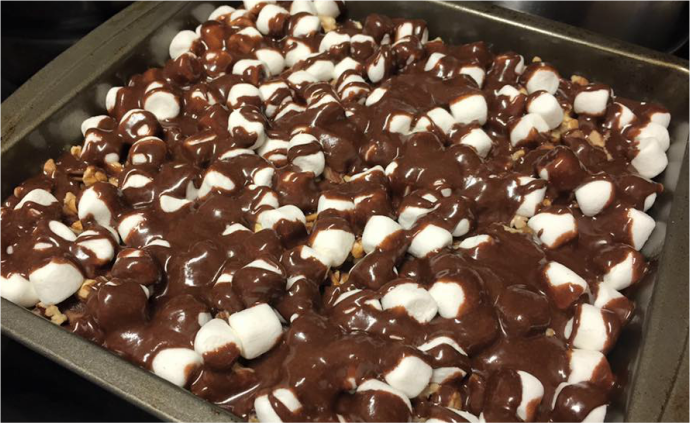 In all my years and in all my endeavors to find the ULTIMATE dessert dish, this one is by far my favorite. Ingredients1 2/3 cup sugar 3/4 cup (1 1/2 sticks) salted sweet cream butter 2 Tbsp water 2 large eggs 2 tsp vanilla 1 1/3 cup all purpose flour 3/4 cup baking cocoa 1/2 tsp baking powder 1/4 tsp salt 3/4 cup chopped pecans or walnuts 1 1/2 cups chocolate chips Directions1. Preheat oven to 350. 2. Melt butter in large bowl in microwave until softened. Stir in sugar, water, eggs, and vanilla. Whisk until creamy. 3. Mix flour, cocoa, baking powder, and salt in separate bowl until well blended. 4. Stir flour mixture into sugar/butter mixture until creamy and smooth. 5. Fold in nuts and chocolate chips. 6. Pour into a greased 8x8 pan (needs to be this size to get the right consistency) and bake for 30 minutes. Check doneness with a fork. (Brownies will be chewy on the inside, so the fork may still be slightly gooey.) 7. Allow to cool at least one hour to overnight. They're even better after they've set! Variations
1 Comment
"There are no failed people. Just failed processes." 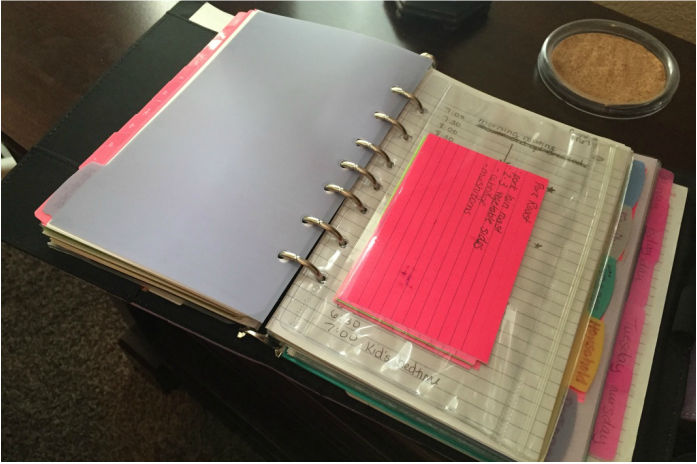 I have often been asked, "How do you do it? How do you manage to keep it all straight, from your writing to homeschool to food storage to everything else you do?" Honestly, it's simple. Someone once said, "There are no failed people. Just failed process." It's not about who you are. It's not about being Super Woman, or even being rich enough to hire people to help you look like you're Super Woman. It's about finding a system that works for you. It's about finding those little processes that help you turn a full-time job into a part-time one. As such, here is a little insight into mine. The first part of what will be a three part series covering my entire GetItTogether system is what I call "The Mom Book." It's based loosely off of the FlyLady Control Journal, though the Mom Book is smaller and more compact, and doesn't contain quite as much information. (I have a larger, more in-depth control journal I keep at home.) Without this book the rest of the system wouldn't run quite as smoothly. It's quite frankly my life blood, the place where the heart of keeping it together all starts--the planning stage. In this book you'll find everything you need, from appointments to meal plans to daily routines, just to get you through the week. Because, honestly, we could all use a little something extra just to get us through our week, and trust me, this baby is definitely a step in the right direction. (See, now. Having a freaky obsession with organizational products isn't always such a bad thing.)
Putting it together:The Notebook 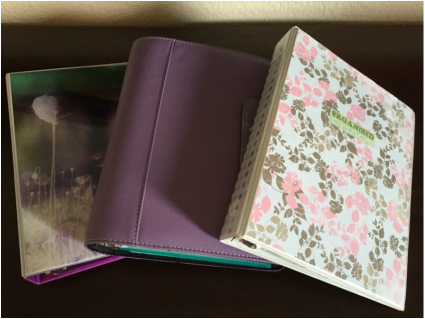 You have several different choices, in terms of what to use for your notebook. You can choose a basic view binder, which will allow you to customize the cover any way you like. I'm a big fan of scrapbook paper. It allows you to make your binder any theme or color, and even add inspiring messages, photos, and little decorations to the front. Our local Walmart carries the mini binder in black or white, and office supply stores will offer it in various colors, to make it even more fun. If you're not that creative, or would prefer to skip the extra work, there are also decorative mini binders available. I also found one of these at Walmart, though the selection was limited, and Amazon has several available online. If you want to get super fancy (or just prefer something with a snap closure to make it more durable) you can go with a Day Planner the way that I did. You don't have to sacrifice girly decorativeness, either. I found mine in a lovely shade of light purple with a silver snap accent at--you guessed it--my local Walmart. The Essentials At the very front of your notebook, you'll want the essentials. Things like the zipper pouch with pens and extra index cards. You may also want a wet erase marker. These work well for checklists, shopping lists, and other items that you will use over and over. You can keep them in sheet protectors in your notebook, and check things off with the marker. Wet erase markers work best because they will not smudge at the slightest disturbance. You'll have to get out a wet wipe or cloth to clean them when you're ready. Other things you'll want at the front of your notebook include pockets for business cards (if you like) as well as the mini binder notebook paper for taking notes. Monthly Dividers The calendar is where we write down all our appointments and activities, and anything else that may effect our day (you can even record the due dates of bills, if you'd like). These are all important elements in our planning, because they will effect everything from our to-do lists to our meal planner. It's not always easy to whip out your Mom Book at every turn to record an appointment, but at the very least stash that appointment card into your book so that you can remember to write it down later, when you're doing your planning. Also record reoccurring appointments or sports schedules as soon as you know about them. You'd be surprised at how much after-school soccer practice and piano lessons can interfere with dinner plans. Addresses/Important Phone Numbers The next section is for phone numbers. You don't necessarily need an alphabetized address book with tabs, but at the very least have a list of important and frequently used phone numbers. Sure, you probably keep most of these in your phone, but it's always nice to have a back-up in one central location. Slide it into a sheet protector to make it last longer, and don't forget everything from the number of your kids' pediatrician to your favorite Chinese takeout. Divided Sections This is the meat of your notebook, the place where you will keep all your pertinent information that will help you do your weekly planning. It's broken down into sections based on purpose. You can use any or all of the suggestions below, or come up with your own. 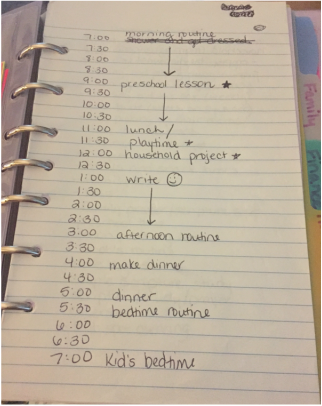 -Routines (chore schedules; daily/weekly) This is perhaps the most important section. It's where you will keep a list of all the little things that you do daily and weekly to keep up. Because, as we all know, keeping up is better than catching up. If you'd like to learn more about establishing healthy habits, the real secret to keeping it together, I suggest taking a look at FlyLady.net. She taught me almost everything I know. I mean, I adapted it to my way, of course, but still... I suggest that as you create your own lists of daily routines, you include allotted times within your day to complete each of the different types of items you'd like to accomplish on a regular basis, as laid out in the index card system, which I'll explain in greater detail below. -Household (projects; schedules; important information) Using the mini binder pocket pages, stick one inside the back of this section and keep blank index cards in whatever color you choose to use specifically for projects. Each time you think of a project, jot it down on an index card, along with whatever details about the project you want to remember and an estimate of the amount of time it will take to finish. I suggest breaking down even large projects into no more than 15-30 minute smaller projects to keep them more manageable. Rather than writing, "Clean out the garage," instead write, "Go through 5 boxes in the garage to donate or throw away." We'll talk about using the index card system later in this post. This is also a good place to keep lists such as household maintenance schedules and information on everything from the contact info for the home warranty company to a running list of summer projects. 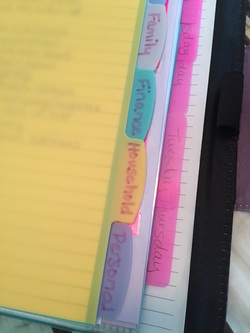 -Family (medical information; notes) Keep lists of everything from the dates of doctors' and dentist appointments to blood types and immunization records. I also keep notes about whatever is going on with each child and things that I need to do to help them get ready for whatever is coming up, from summer camp to kindergarten readiness. If you'd like, you can also slip a mini binder pocket page into this section as well, to keep project cards that are specific to family members, such as "Hem hubby's pants" or "Mail camp forms for kids." -Finance (bill calendars; account numbers; phone numbers; check register; budget) If you choose to use this section, at the very least keep a list of bills including when they are due and the standard amounts, as well as contact information for the billers. You can mark off each bill as it paid each month. You can also keep a check register, a copy of your monthly budget, and unless you're afraid of your notebook falling into the wrong hands, a list with all the account numbers for your utility companies. If you choose, you can create cards for each bill to use with the index card system, to remind you to pay it on your chosen day. -Church or School If you have responsibilities in regards to church or school, use this section to keep notes and lists. I suggest using an entirely different notebook for work, because of the amount of information you'd keep in it--unless you work part-time out of your home (such as in a writing capacity). -Food Storage/Preparedness I use this section for notes and lists as well, such as information I want to look up later, or items I'd like to add to my food storage. Again, if you chose, you can slip include a binder pocket in this section, to keep cards with small food storage or preparedness projects. -Personal (goals; favorite quotes; book lists) This section is just for you. I keep sheet protectors with photos of Mother's Day bouquets and little notes from my kids, as well as inspirational images. I also have running lists on things I'd like to do better, books I'd like to read, as well as a copy of my personal mission statement and little quotes I live by. -Meal Planning (recipes; shopping lists; meal planners) This is perhaps the section you will use the most in your planning. It's where you're going to keep all your family's favorite recipes, your shopping lists, and your meal planners. Using half a sheet of card stock and the self-adhesive photo corners listed above, create your own recipe card holders and slide them into the sheet protectors as shown in the picture below. (Eventually you may collect so many recipes you'll want to use a separate notebook to hold them all.) That way, as you're planning your weekly meals and shopping list, all you have to do is pick out 7 recipes (for a week of dinners), record the ingredients on your shopping list, and then collect the 7 cards for use in the index card system. 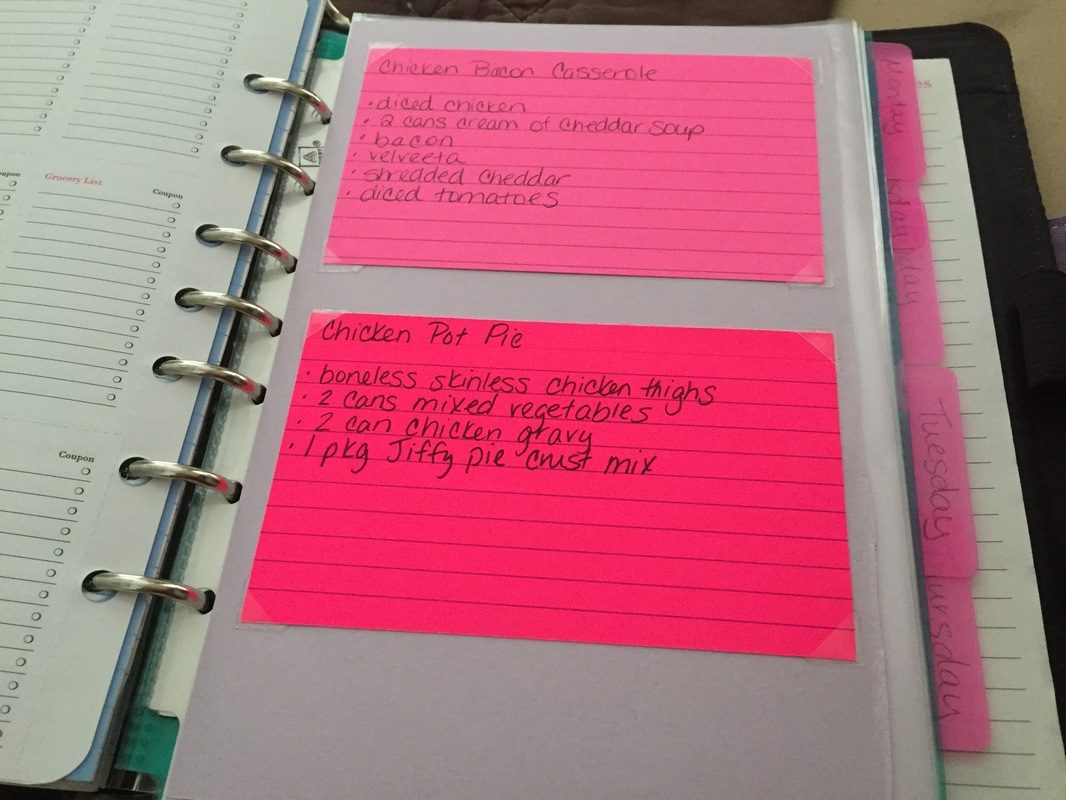 The Index Card System 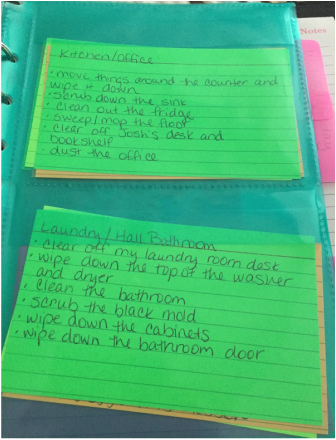 This is the place where all the planning comes together, and will become easier the more you use it and build up your selection of pre-filled cards, from household projects to recipes. These colorful Chevron bordered index cards are my favorite, though admittedly a little pricy. You can even purchase index card paper and print them, or download this template and use card stock, to make your own. I also find it helpful to keep a spiral bound set of multi-colored index cards with a pen lying around handy, for those times when I want to jot down a quick recipe or project idea. Whatever you decide to go with, make sure they're fun and festive! Not only will you be working with them weekly, but if you expand them to use with the Mom Board or chose to add them to your fridge, you'll have to look at them daily, too. To prepare the Index Card System to place in the back of your notebook, simply label each one of the sections in the secure-top sheet protectors with a day of the week, using the sticky filing tabs. Then, as you're planning, collect the cards that are pertinent to each day of the week, and slide them in. For example, perhaps your weekly housework routine has you working on the kitchen on Monday, you've planned to have Chicken Bacon Casserole for dinner, you're going to reorganize your pantry as part of a household or food storage project, and you've set a personal goal to jog 3 miles that day. All of these cards should be slid into the section marked "Monday," and then pulled out that morning and placed in a strategic location, such as on your fridge or Mom Board. As long as you've worked out a rough routine for that day, and allotted times for Housework, Household Projects, Personal Goals, and Dinner, you'll now know exactly what to do during those times. I know it may sound like a lot at first, but trust me, you'd be amazed at what you can accomplish with a little planning and direction--and how easily you'll be able to avoid distractions when you know just what you're supposed to be doing during that time.
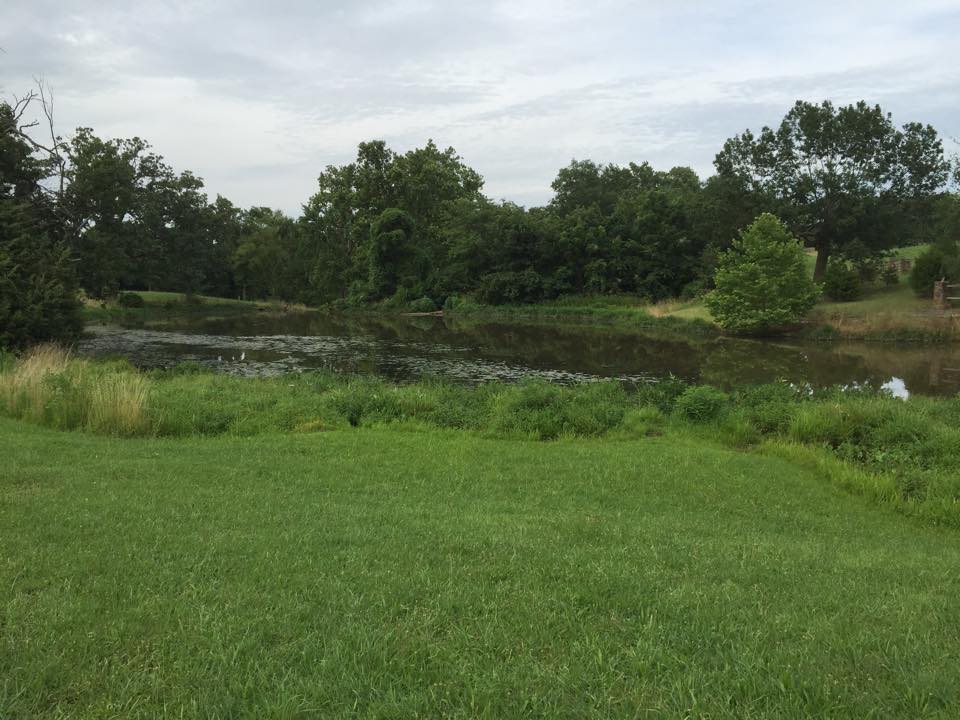
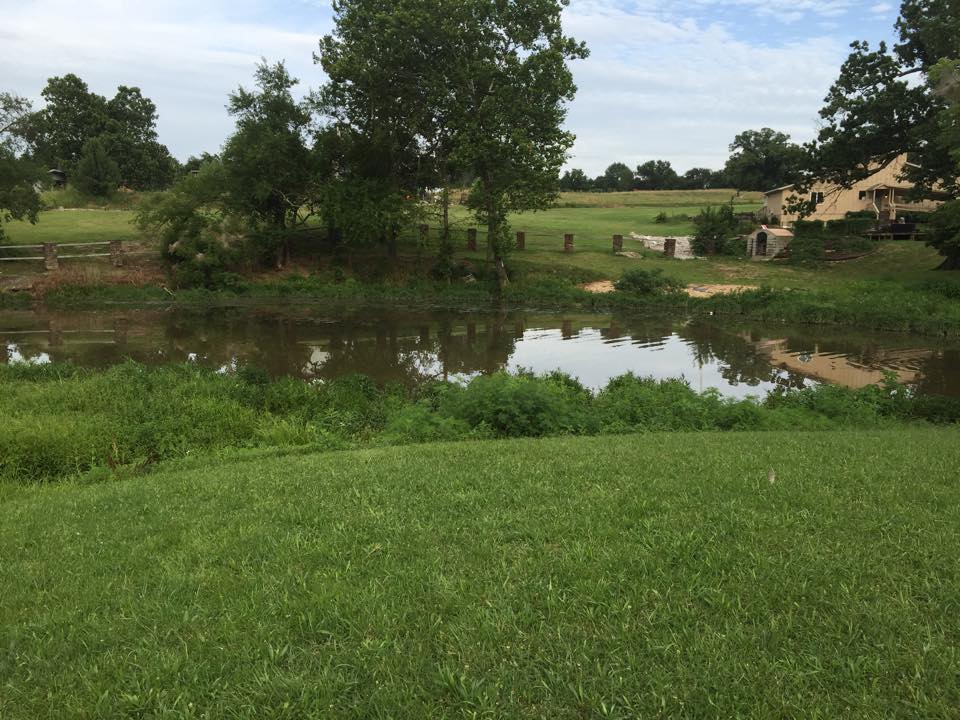
It's no secret we stick to a modest budget, allocating no more than a third of the hubby's gross income to live on each month, sharing a car, and owner-occupying a duplex. What most people don't know is why... 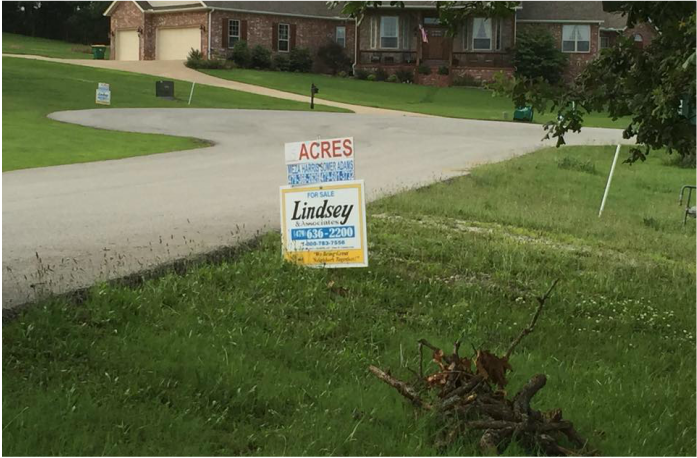 For years our friends who live on the other side of the county have been bugging us to move closer. (In our defense, we actually did two years ago. We were in a whole 'nother county before then.) Still, even making it into the same county leaves quite a bit of drive time just to hang out with nearly everyone we know, ranging from twice a month to twice a week. So as Josh's December graduation date slowly approaches, we'd began seriously considering caving in to their requests. After all, college isn't cheap, and having that out of the way would free up some serious cash flow in order to make the significantly bigger mortgage payment we'd have to make just to find a house comparable in size on that particular side of town. The more we looked, however, the more we realized why we settled on this side of the county in the first place. (Everything is cheaper per square foot over he'e on da east-side.) The more we also began to realize that, no matter how many houses we looked at, none of them would ever really have what we wanted. So what did I do? What I always do when I can't find an out-of-the-box approach that will work the way I want it to: (say it with me, now) I design my own! 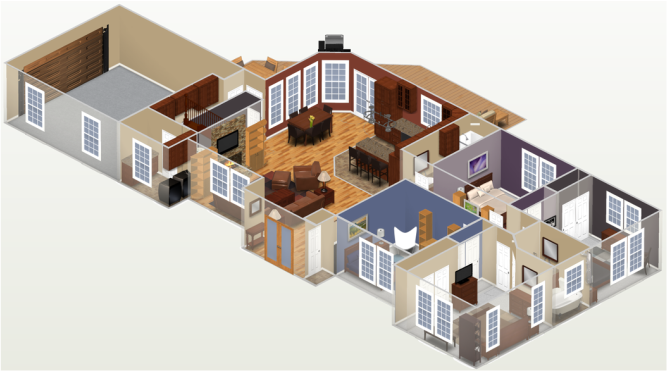 First Floor Enter our dream house! It's changed a bit over the years since I first started designing it. The planned lot has gotten smaller, as I've agreed to trade in my "homestead-living" dream of 40 acres in south Missouri for something closer to town. The house has gotten bigger as we began to discuss our wants for more room, greater amenities, and a more long-term situation. Invariably, though, most of it is the same. It still has the walk-out basement on water-front property feel, now complete with 5 bedrooms, 4 baths, an office, family room, storm cellar, bonus room, and nearly 3800 square feet of wide-open-with-lots-of-windows floor-plan goodness.  Walk-out Basement So, instead of spending months searching desperately for another mid-size "transition house" to suit our needs just to live closer to everyone, we've decided to take a different approach. (Sorry, all-the-way-across-the-county friends.) Rather than looking for a new house, we'll be looking at land and working towards our ultimate goal of building the house of our dreams--from tightening our budgeting belts to picking out brick patterns and paint. Sure, it may take us a few more years to save up the down payment and position ourselves financially to get to the point where we can finally move. But I've never been one to settle for less than what I really want. (It's a good thing we're fairly comfortable in our little 3-bedroom duplex, too. Especially since someone else is paying over 70 percent of the mortgage.) And until that time we'll be spending our Friday night date-nights on house-planning. Last week's date-night was especially fun, as we traipsed around a squishy 1.15-acre lot (it's been raining quite a bit lately) on a quiet cul-de-sac just outside of town that I've had my eye on for some time. It may not be what we end up settling on (there seems to be some issue with run-off), but it's a start, and until we can break ground at the very least it will give me something to visualize every time I have to turn down a friend for a lunch-date, chauffeur Josh back and forth to work, squeeze a dozen people into my tiny kitchen for a kid's birthday party, or make a slightly-laughable grocery budget work. Plus, spending date-nights house-planning with hubby sounds like loads of fun! 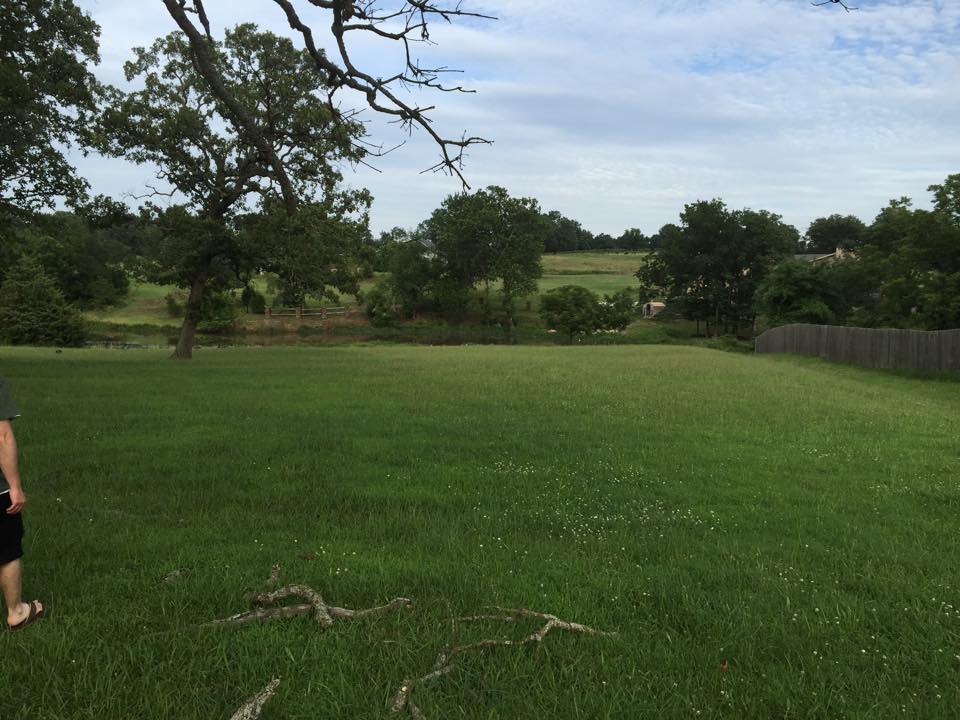
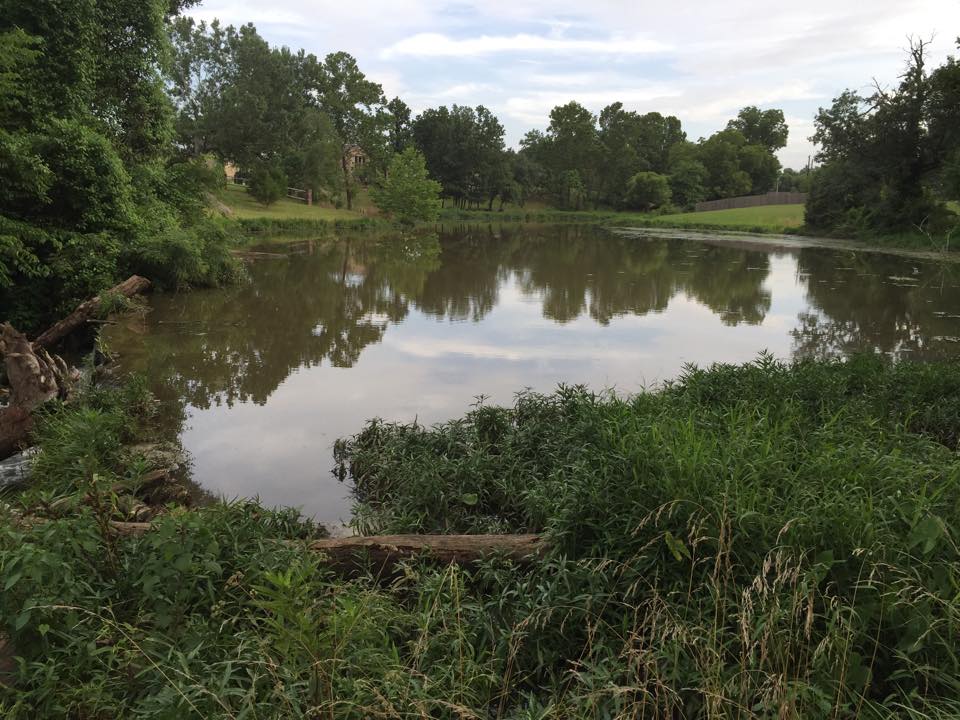 McKissic Creek It's inevitable. Anything that can happen in the Sutton household, will happen.
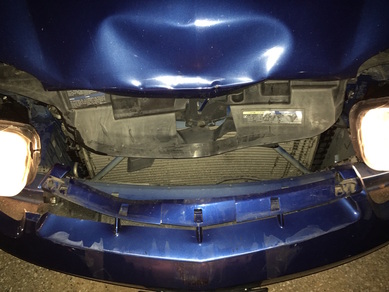
We were going to have to replace it thanks to the ridiculously low assessment value deemed by the insurance company and the subsequent total loss. And the last thing we wanted was to blow our already tight household budget on a new car payment. So I knew I had some work to do. Step 1: Find a Fleet CarAs a member of The Church of Jesus Christ of Latter-Day Saints, I'd heard since I was a teenager that whenever I was ready to buy my first car, I should contact the local mission office. The church currently operates 405 mission offices around the world, each serving as the central location for missionary operations within a designated region. And each and every one of the approximately 88,000 missionaries have to get around somehow. But transportation for that many people in that many places can be expensive. That's why the church maintains a fleet of mission cars that are purchased new from wholesale retailers, impeccably maintained with mileage limits, regular inspections, and strict rules, and then resold at their depreciated value when they reach around 50,000 miles. So, as soon as I knew we were going to need a new car, I called our local mission office two hours away in Tulsa, Ok. I was greeted by an elderly missionary who was able to explain to me, in limited detail, that they had one 2012 Chevrolet Malibu currently on their hands with 46,000 miles and a sticker price of $9400. Silly me, of course, still didn't want to drive four hours round trip to Tulsa. So I, being the stubborn gal that I am, thought I could find something around the same price range with the same mileage locally. HA! I say to that. I was able to find one other vehicle that got the kind of gas mileage the Malibu had, with around the same miles and the same price tag. I contacted the seller and found out it had been sold two days earlier. So much for that. 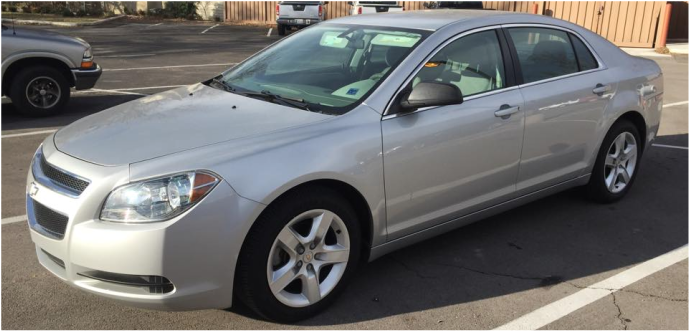 What I did find, however, was a local 2012 Malibu that we could, at the very least, test drive. I made an appointment with the used dealership to give the car a spin before we agreed to make the 118 mile trip to Tulsa to buy one of a similar make and model. Don't get me wrong, we weren't picky. As long as the thing got decent gas mileage, was in our price range, and could fit our family of four we had very few preferences. But I figured if we were going to drive that far we should at least know in advance we didn't hate the car. (I was also secretly hoping that I could talk the dealership down from the $14,888 price tag. Turns out, not so much. As soon as we told him we could get the same exact car for $9400 he told us that we'd be crazy not to drive down to Tulsa to pick it up that next morning.) So that's exactly what we did. But before we could load the kids into the back of the rental car and take off down the highway, we had to... Step II: Secure FinancingHere's where the real kicker came in. A low price tag doesn't mean a whole lot if you can't get good-term financing to go with it. Luckily my resourceful better-half had heard that credit unions had notoriously lower interest rates than banks. That's because a credit union is a non-profit organization designed to cater to its members. It's there to meet its members' needs, not pad it's bottom line. So we applied for auto loans at two different financial institutions, Western Federal Credit Union and our local bank. The bank where we had been doing business for the last ten years offered us an interest rate that was twice what Western Federal wanted. You can guess which one we went with. The whole approval process with Western Federal took all of two hours, five minutes of which involved the online application and the rest was waiting for the phone call. After that time the Western Federal loan officer explained that, because it was a private party sale, there would be some paperwork required ranging from obtaining the transferred title to a signed affidavit proving the elder selling us the car was really authorized to do so. Luckily there was a relatively stress-free work around. Instead of starting off with an auto loan, Western Federal would issue us what they called a "holiday" loan instead. We'd sign the loan papers, which involved a higher interest rate, and they'd issue us a cashier's check that day. They'd push the first payment out 45 days during which time we could get the title in our name and come back in with it to do a cash-out refinance auto loan with the same low rate we'd discussed. The most it would cost us was $42 in interest for that first 45 days. A small price to pay for being able to spend ten minutes signing paper work, being issued a check that same day, and picking up our new car the next morning. All in all we ended up with the nicest car we've ever owned for the cheapest price tag we've ever paid. The entire ordeal cost us all of 6 hours (4 of which was driving) and $150 a month for the next four years (thanks to the low interest rate and the $2,000 down payment from the insurance settlement). Not a member of the church? No problem. Just go to the church's website and contact the missionaries assigned to your area. They'll give you the information you need to get in contact with the local mission office, who'll still be happy to sell you the car. Not comfortable with that? Most dealerships maintain a fleet department with vehicles significantly cheaper than their counterparts. Just contact some of the local dealerships and follow these steps in finding you next new car. Not a member of a credit union? We weren't either. Joining the credit union required no more than opening up a free savings account with a $5 minimum. Most credit unions have stipulations for being eligible to join, but Western Federal required little more than living or working in the local area. So if you find yourself in a predicament like we did, keep these simple steps in mind before being sucked into a car payment that breaks the bank. As long as you have few preferences in make and model, you can walk away with little effort and a car payment you can be comfortable with.
For no other reason than because it's yummy. 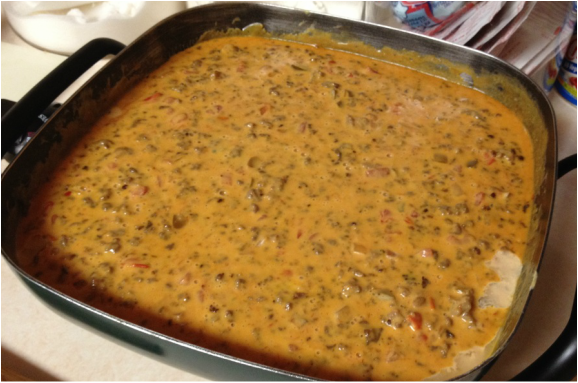 This recipe is one of my family's favorites. It's super versatile. You can you use it as a party dip (which is always a hit) or pour it over cooked macaroni noodles and mix. I've even doubled the meat and used it as filling for enchiladas! Ingredients:1 lb ground beef 1 lb Italian sausage (the loose kind--we like Jimmy Dean) 1 32 oz block original Velveeta (you can use the queso blanco version for a milder flavor) 1 10 oz can cheddar cheese soup 2 cups chunky salsa 1 10 oz can original Rotel Directions:1. Brown ground beef and Italian sausage in skillet. Drain.
2. Return beef and sausage to skillet. 3. Cut Velveeta into small cubes. 4. Add Velveeta, soup, salsa, and Rotel. Stir. 5. Cover and simmer on medium-low until Velveeta is melted (about 10 minutes), stirring occasionally. Enjoy! |
HomeschoolArchives
September 2015
Categories |

 RSS Feed
Photo used under Creative Commons from Kevin Dinkel
